A unique piece of Ramon wood — or Breadnut, depending on your preference — had been sitting in the shop for 18 months waiting for just the right client when we received an invitation to the 11th CHRIStal Ball, which benefits CHRIS Kids, a great organization in Atlanta with the mission to “heal children, strengthen families and build community.”
The year before, I had created a table to donate for a CHRIS Kids fundraiser, and I decided to take this unusual piece of wood and make another table to benefit this organization I admire so much.
For those who like backstories, here’s the history and a few craftsmanship details about this table.
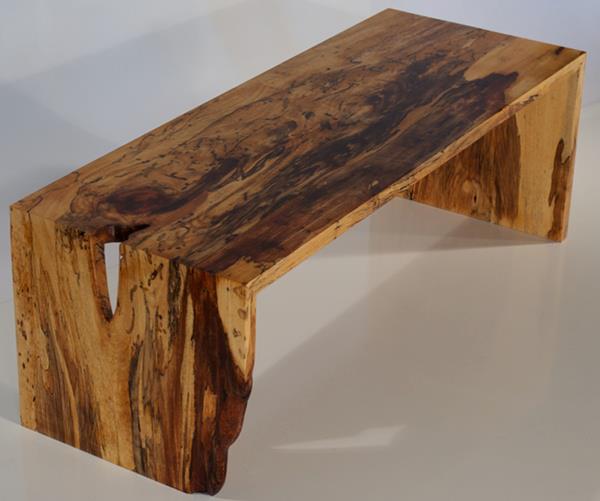
The next time I walked into the shop and spotted this board, I had a quick flash of inspiration: I’d make a table with waterfall edges to donate for the auction. The waterfall edge is made by cutting a wedge out of the back of the piece and folding the table down so that the grain runs continuously over the joint. Both ends of the table have this feature.
The Breadnut tree is found widely in second-growth Central American tropical rain forests, where its presence in deep forests is considered evidence of pre-Colombian Mayan tree cultivation. The Mayans are thought to have preserved the seeds in underground chambers, probably as insurance against famine. Today, the sweet, succulent fruits are generally roasted and used to make a coffee-like drink.
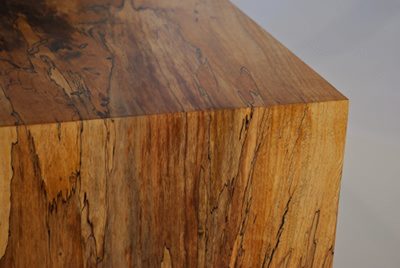
Based on the amount of insect damage and spalting in this piece of Breadnut, the log that it came from had likely lain on the forest floor for quite some time before being harvested.
“Spalting” is a by-product of the rotting process. When the temperature and humidity are right, spalting can cause many different and beautiful patterns in rotting wood. The unusual coloration is due to chemically induced reactions between the wood, fungi and insect deposits, which often result in black, pink, gray and multicolored streaks in the wood.
One end of the slab had rotted away, but I wanted to incorporate it into the design of the piece instead of cutting that piece off. To harden this section and fill in the areas that had insect damage, we coated the entire piece with multiple applications of epoxy.

The slow-setting epoxy absorbed into these soft areas as well as the voids created by the insect damage. We then sanded off the epoxy, and applied three coats of lacquer. Once cured, the lacquer was wet-sanded. Then we hand-rubbed the lacquer with pumice and rottenstone. The final step was applying a few coats of paste wax.
It was satisfying to take such a cool piece of wood that I had no real plan in mind for and end up with a table I was pleased with and could offer up for a good cause.
~Chris Dehmer