As promised, Dark Horse is happy to (at last) bring you the final installment of our “Professional cabinetmaker wrestles his own kitchen reno to the ground” story, complete with photos.
As mentioned in earlier posts, there are distinct pros and cons to doing your own kitchen overhaul.
The good news is that you’re likely to end up with exactly what you wanted, down to the smallest details.
The bad news? That might take a lot longer than you’d imagine.
When you’re spending most of your time working on projects for paying clients, it can really slow your progress to the finish line of your own kitchen. Just to be clear – for me, the finish line doesn’t mean you can put things in your cabinets or cook a meal in the kitchen. For me, it means every last detail is complete, and every aspect of the kitchen reno is so pristine that you’d feel at ease about bringing in a professional photographer to photograph the “After.”
After the bulk of the work was complete on my project, a handful of items lingered on the check list for months and kept me from declaring it finished.
Getting by with a little help from your friends
A major woodworking trade show was held in Atlanta last August, and my friends and fellow board members from the Cabinet Makers Association came to town.
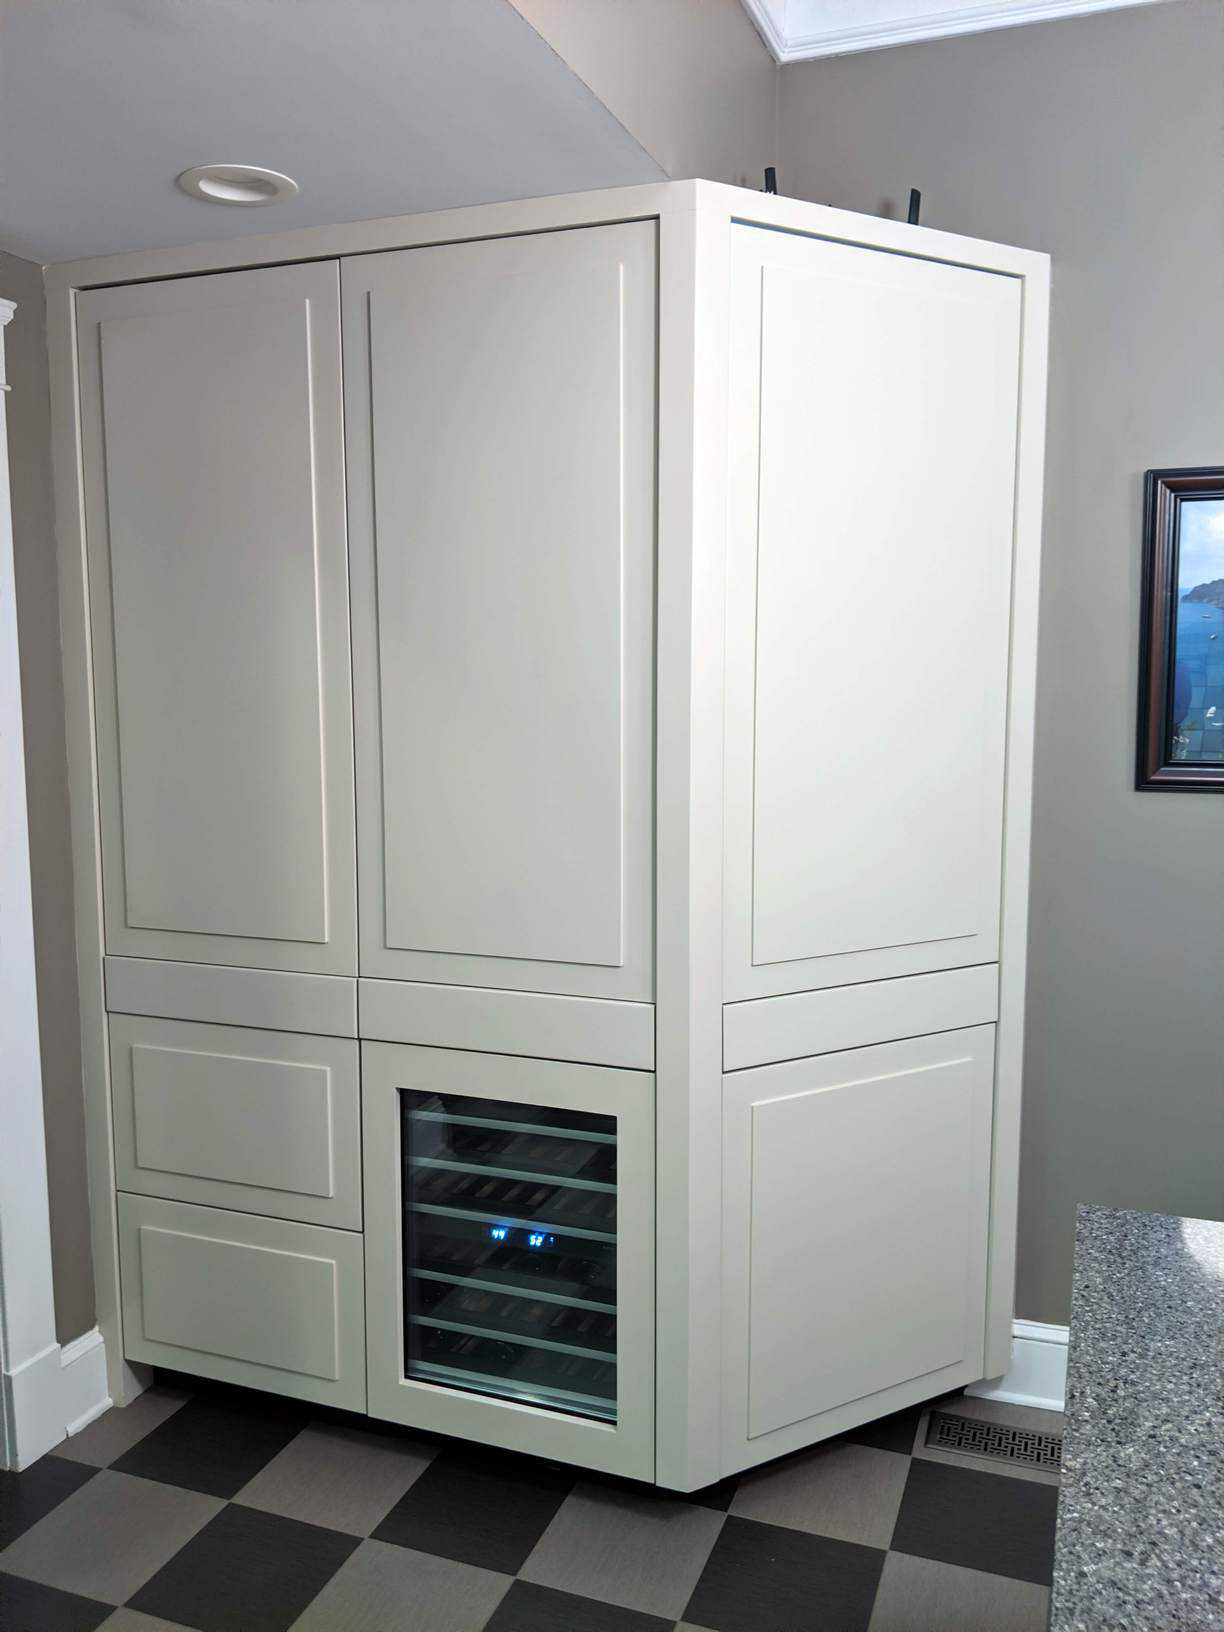
I had the CMA crew over for dinner one night before the show got under way. Given that everyone knew about my reno, it was a great opportunity for them to see the mostly finished version. I planned to tell them about one of the lingering issues on my to-do list and get their advice: The wine fridge door wouldn’t open correctly.
It was hitting the divider to the right of it, and I hadn’t been able to figure out how to fix it.
Former CMA president Matt Krig came over first, and we looked at the problem door and talked through it; then board member James Fox arrived and joined the conversation. Eventually, Monika Soos and her husband Radu arrived, and I pointed out the problem to them.
“Why don’t you just reverse the door?” Radu asked.
Of course.
The very simplest and most obvious solution had never even crossed my mind – or occurred to the others as we stood around staring at the problem.
Sometimes you can’t get out of your own way.
(Thank God they came over.)
The details
Aside from those final tasks dragging on for longer than I’d have liked, I couldn’t be happier with the way the kitchen turned out.
It has the look and feel we were going for – a mix of modern and retro elements (you can read more about the thinking behind the design in this earlier installment).
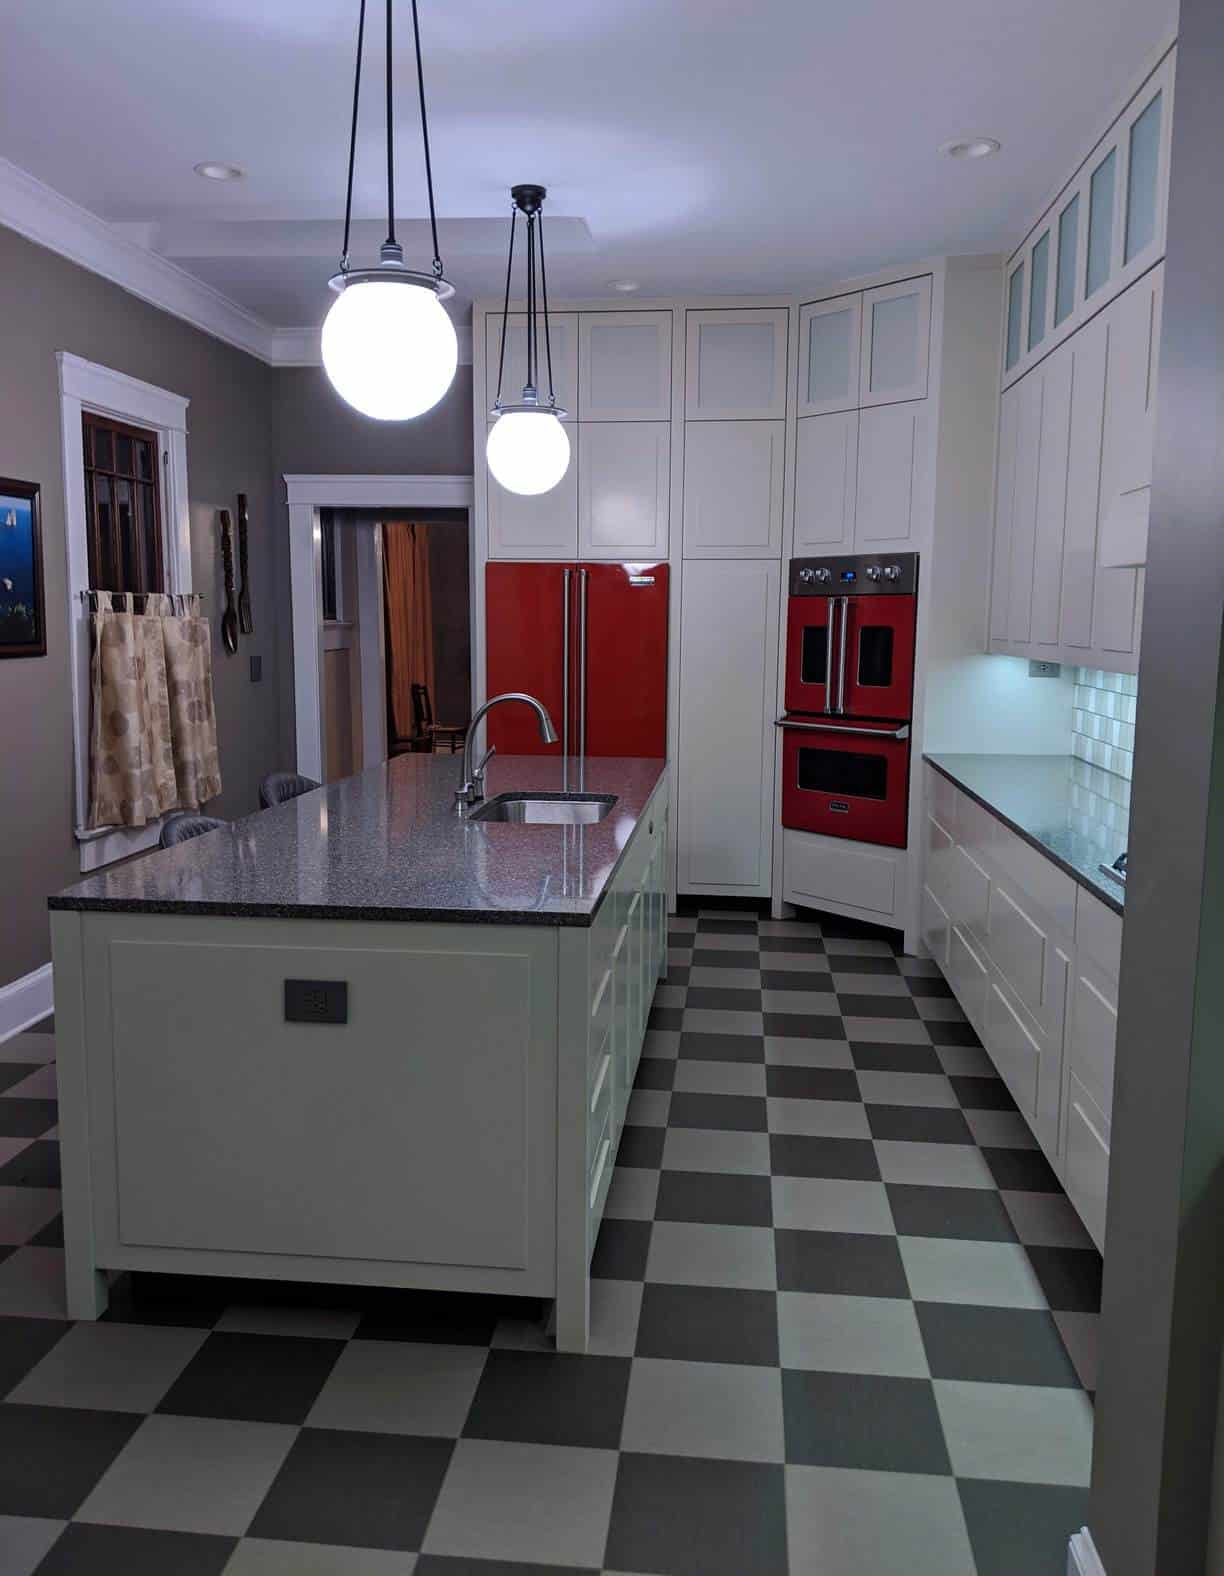
The color scheme was an off-white that had a green tint with red and gray accents. Designers Christy Dillard and Heidi Pearce helped with the overall color schemes (including working around the red oven).
Here’s a rundown of the main features and details in the new kitchen:
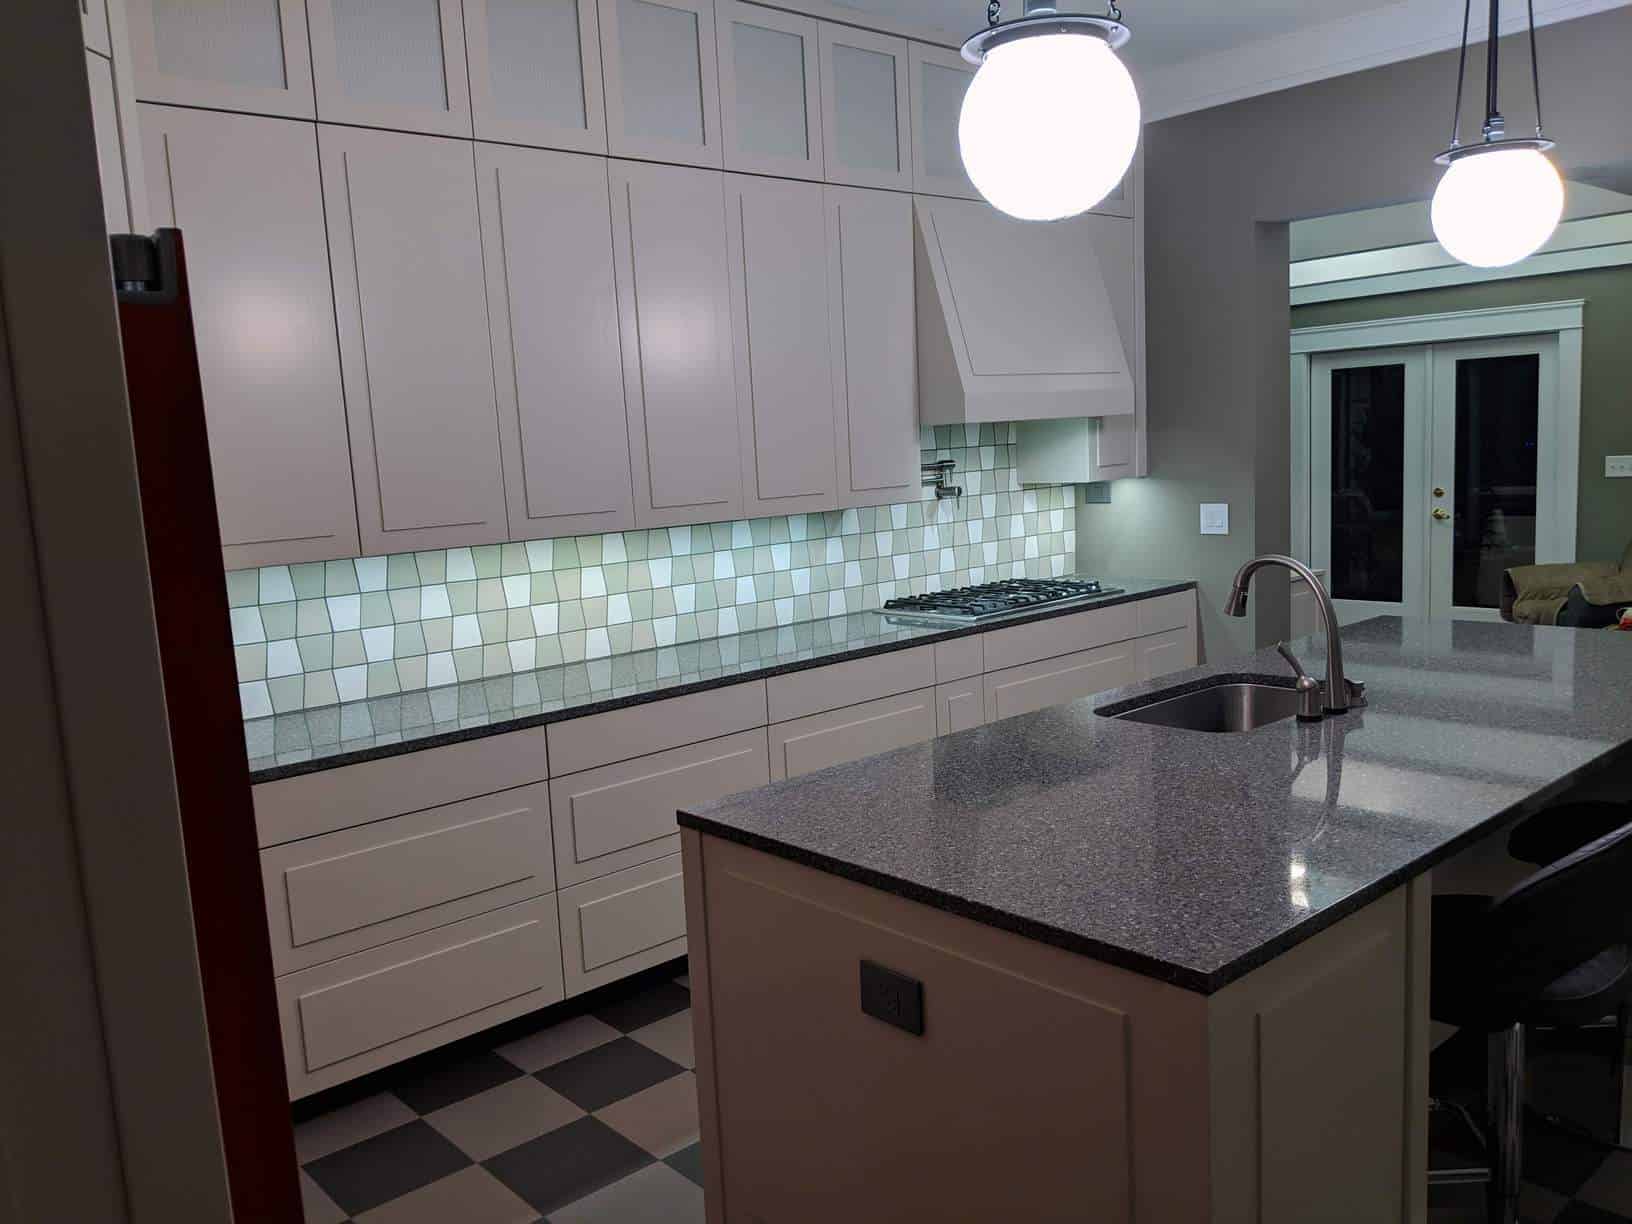
- The cabinets are transitional, somewhere between modern and Art Deco style, painted with a color called Tapestry Beige. The material is routed MDF.
- The countertops are quartz.
- The idea of having some glass-front cabinet doors was appealing, but that limits what you can store in those cabinets if you want to keep the overall look of your kitchen aesthetically pleasing. To steer clear of that limitation, we went with ribbed glass and put a panel painted the same color as the cabinets behind the glass on the upper cabinets.
- The decision to use unusual/retro-style appliances was an important part of the design scheme. Viking offered a double oven in factory red – one of the two ovens has a traditional pull-down door and the other is a French-door style. The placement of the ovens in the corner of the kitchen is a bit unusual, but it’s very effective.
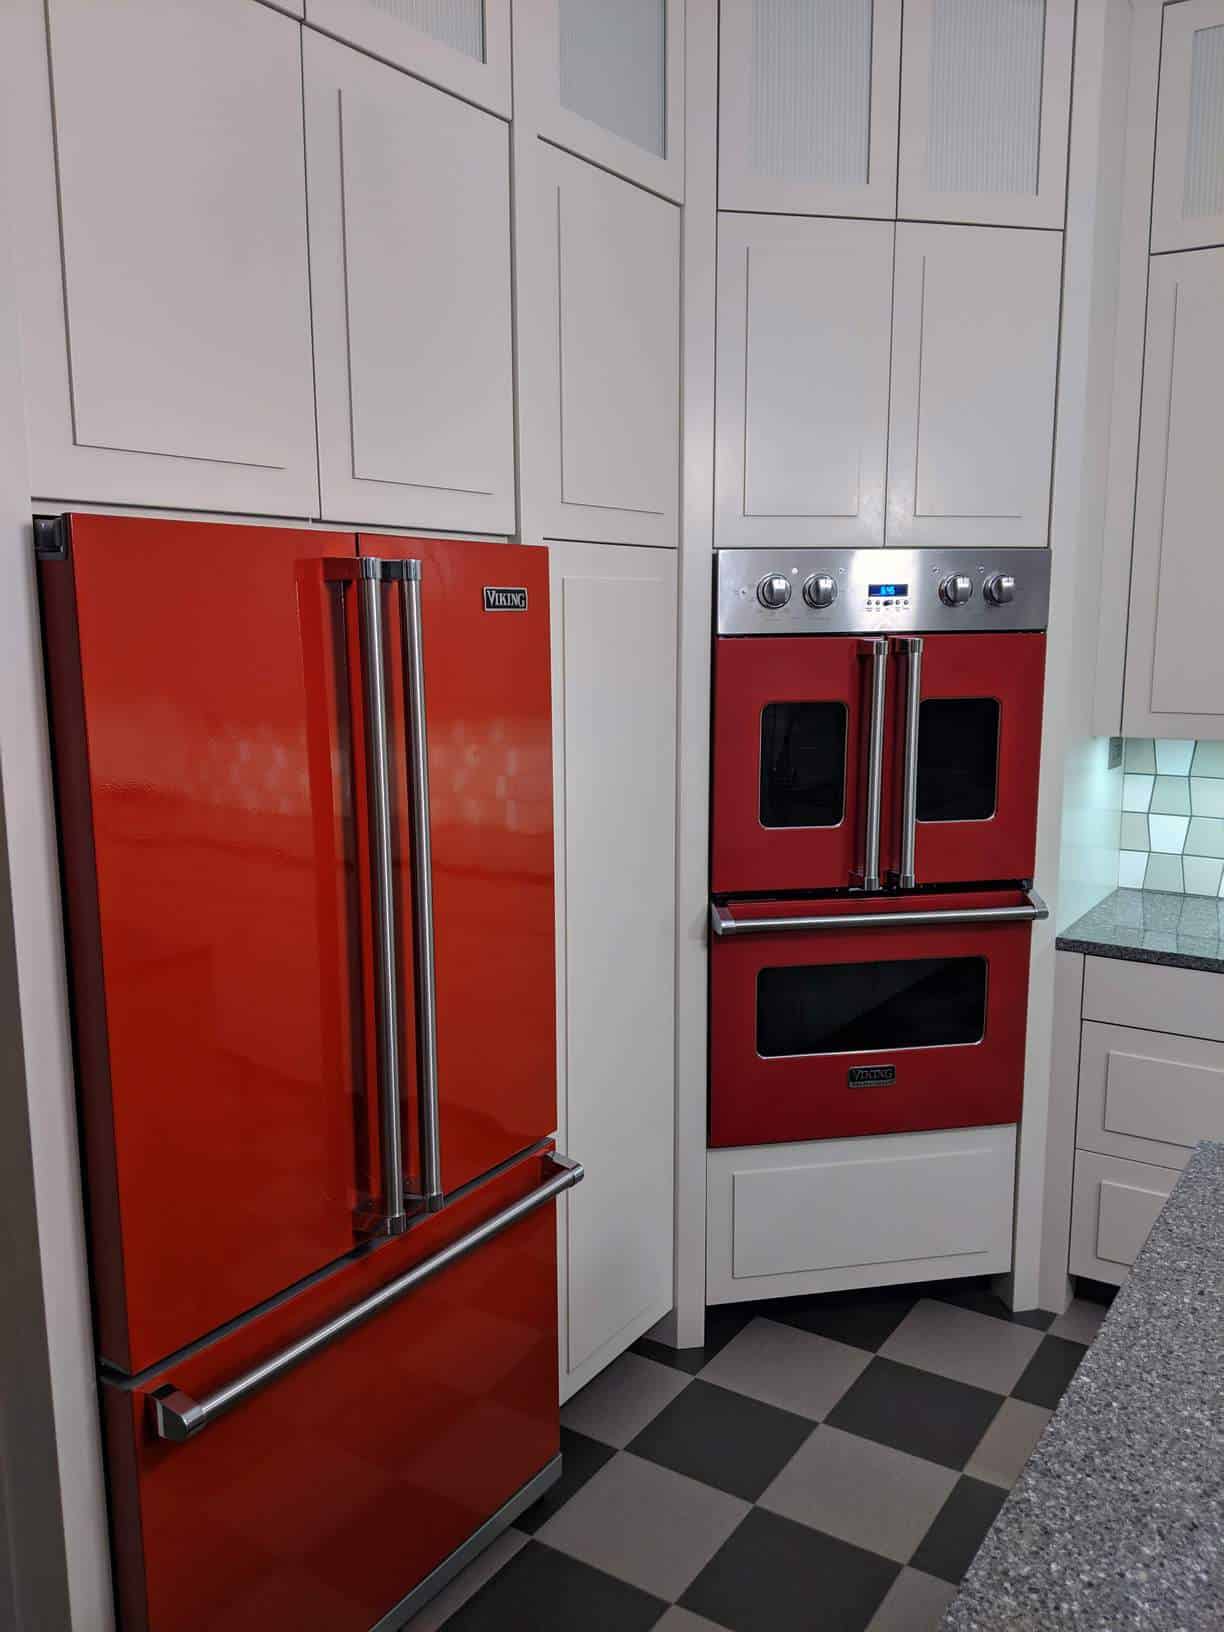
- Unfortunately, we could not find a red retro refrigerator to match. Thanks to a brilliant suggestion from the staff at appliance dealer Howard Payne and Co., we found a stainless steel model and took it to an auto body shop where it was painted to match the ovens.
- All appliances were made by Viking, with the exception of the wine fridge, which was made by Jenn-Air.
- The Blum Servo Drive touch-to-open system (a last-minute addition to the budget that was well worth it) is a favorite feature. Only two things in the kitchen require opening: the dishwasher and the wine fridge. In addition to the convenience of the touch-to-open system, the lack of hardware also makes for clean lines.
- The backsplash was created from made-to-order tiles in shades of brown, cream and pale green.
- The pendant lights came from Etsy.
- The flooring is porcelain tile.
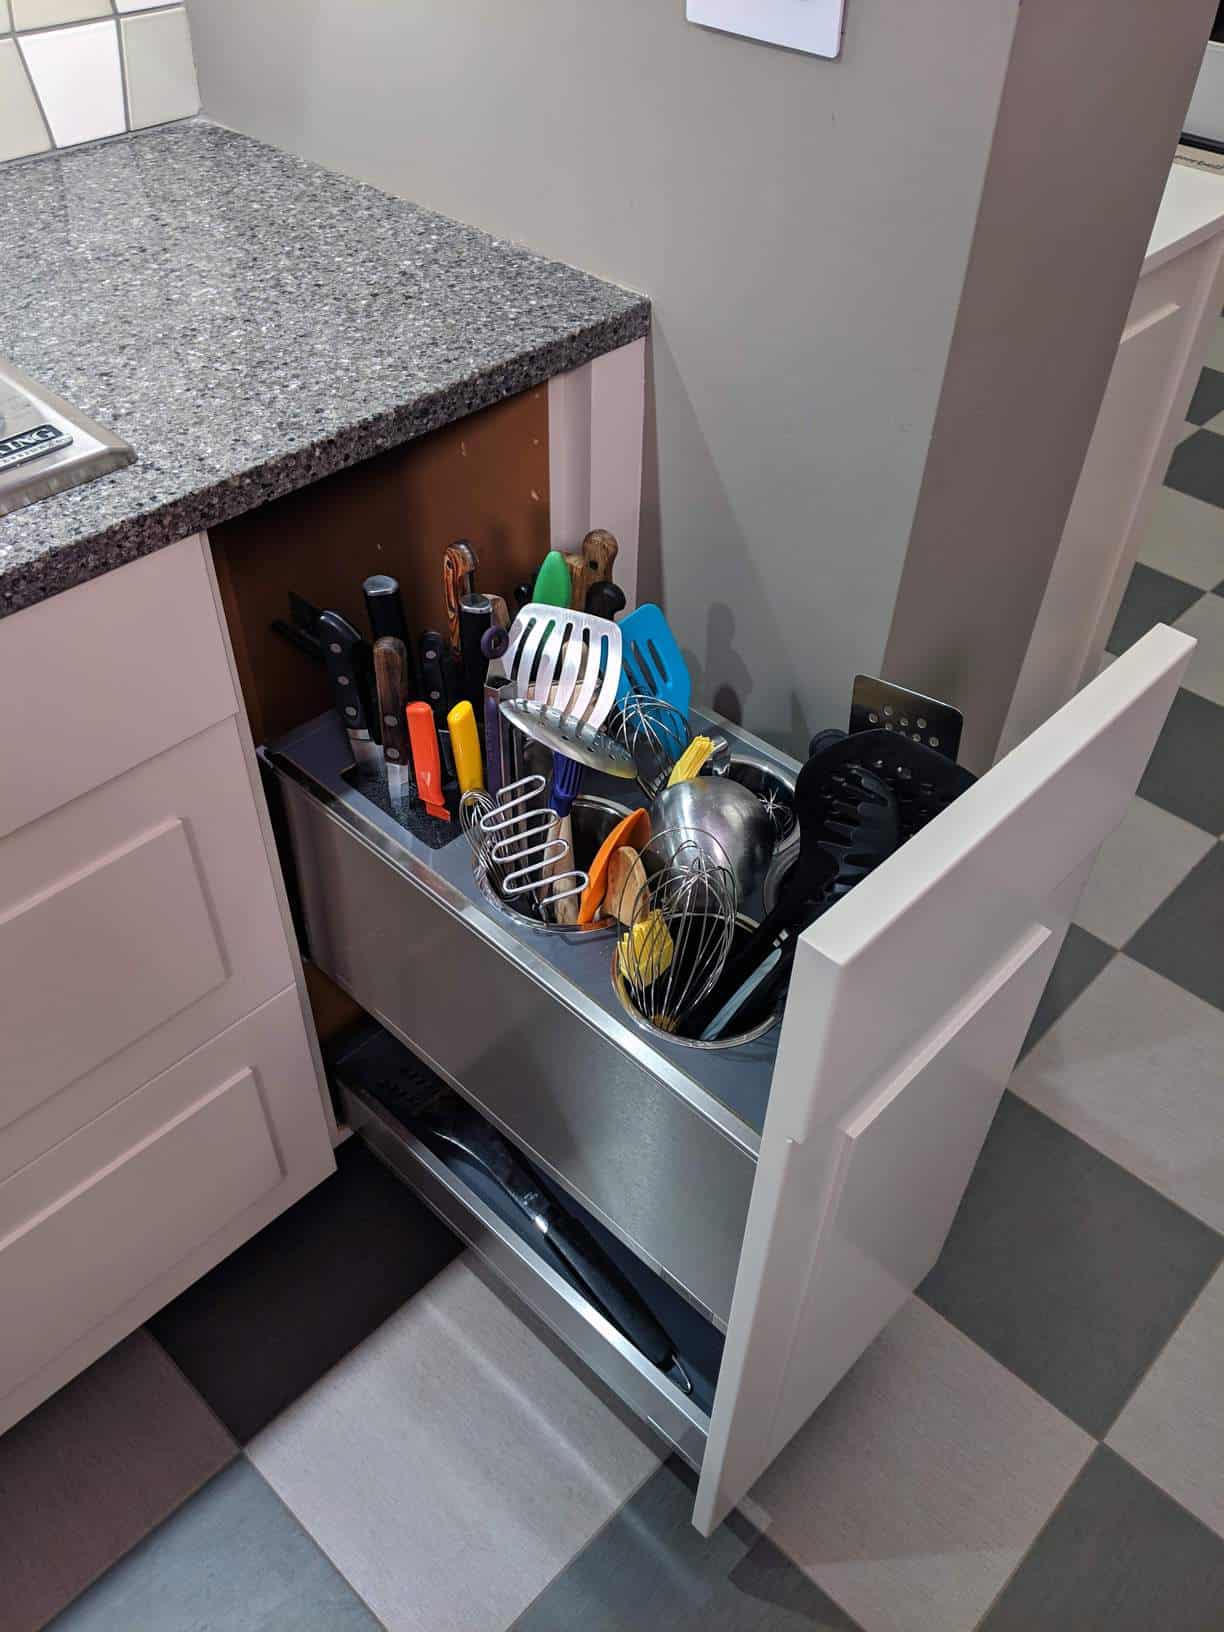
- There are some other cool features scattered through the kitchen, including a roll-out pantry and a deep drawer with inserts to corral long-handled kitchen utensils.
- Where a desk used to sit in the old kitchen, you’ll now find the wine fridge (the one with the “problem” door), a cabinet to hide the microwave, toaster and coffee maker, and big, deep drawers (liquor bottles are tall, after all).
- A 27-inch iMac is mounted in the corner cabinet, which makes it easy to look up/display recipes or stream movies/TV while cooking.
The reno didn’t increase the square footage of the kitchen, but taking the cabinets all the way up to the ceiling added a lot more storage. The adjacent laundry room also got an update with a new stacking washer-dryer set and new flooring to match the kitchen.
I also added a small, matching cabinet in the adjacent sitting room (which was converted from a sleeping porch during an earlier reno). This cabinet serves as a bar area and has extra storage.
The bottom line
So was it worth it to bring my work home, so to speak, and slog through all of the disruptions and delays?
Absolutely.
I spend my days giving my clients their dream kitchens, and it’s really satisfying to finally have a dream kitchen waiting at home.
~ Chris Dehmer
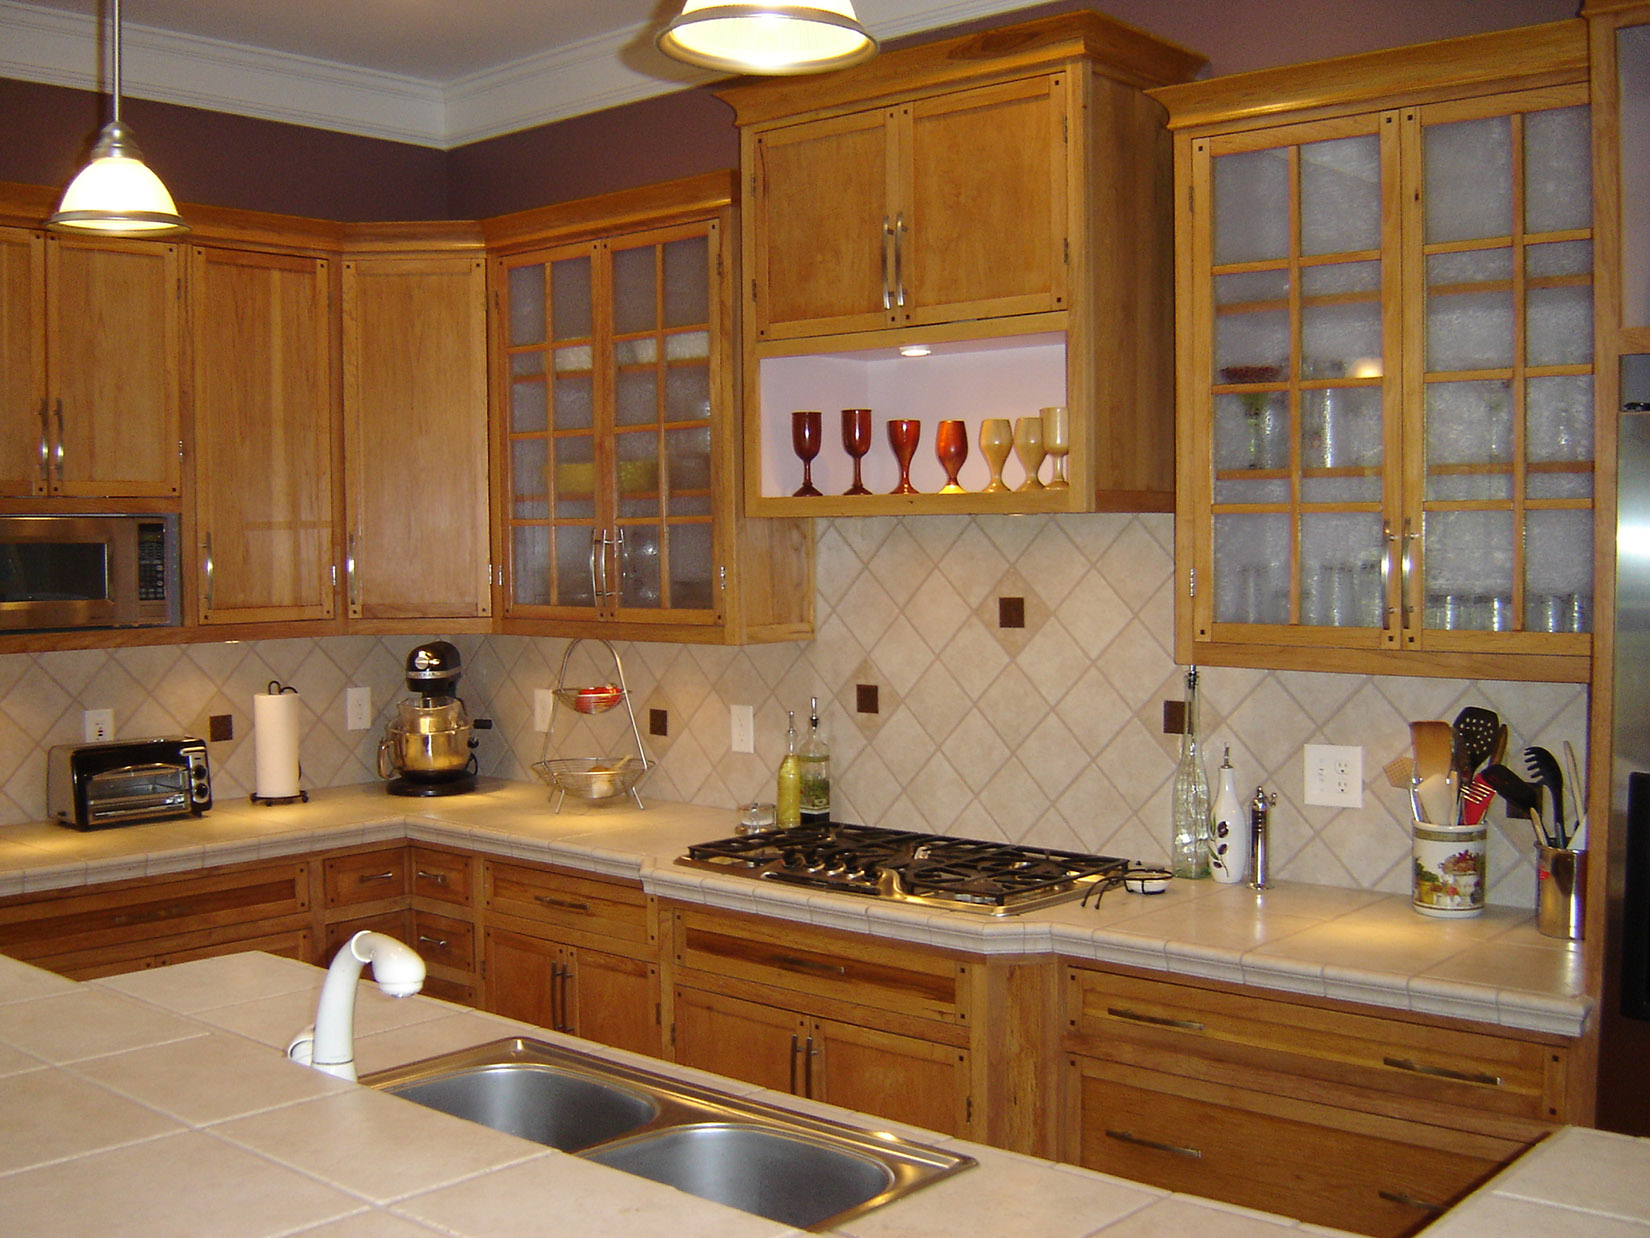
Postscript: Here’s a photo of the previous kitchen as a reminder of where we started. To see more “before” photos, read the first post in the series.